Hello world,
as you perhaps know, I have created a small digital photo processing tool (for Windows systems): Gurkes Fotobatch. I’m about to release version 0.5 and avail myself of the opportunity to introduce the function of Fotobatch to you by means of some text and screenshots.
Content (don’t worry, the sections are short):
- 0) Introduction
- 1) Create a new picture directory
- 2) Start Fotobatch
- 3) The result in detail
- 4) Advanced usage
- 5) Download / updates / information
0) Introduction
Rename, resize and turn your pictures with only one click: Fotobatch is useful if you rapidly want to make your pictures ready for web-publishing: It is a small software designed for fast image (digital photo) processing in batch mode.
Imagine you took some photos with your digital camera and you want to send them to a friend via email or you want to upload them to a web gallery. Stored on the card of your camera, they are very big in resolution and file size; too big to upload them anywhere. Additionally, you maybe took many many photos with varying orientation (portrait/landscape) and you don’t like to turn them all manually. Furthermore, the photos were taken of a special event on a special date and you would like to put this information into the filename of the picture files, so that you’ll never forget and each photo identifies itself by its filename. Fotobatch is ideal to help you with these and more problems, as you will see below.
Okay, again imagine that you took some new photos… now I’ll lead you through the two very easy steps of processing them with Fotobatch.
1) Create a new picture directory and put your new photos there
Create a directory YYMMDD_eventname (while YYMMDD corresponds to the event’s date) and put the picture files from your camera to this place. In my test case, I named the event fotobatchtest and I chose November 29th, 2009 (although this wasn’t the day I took the “test photos”):
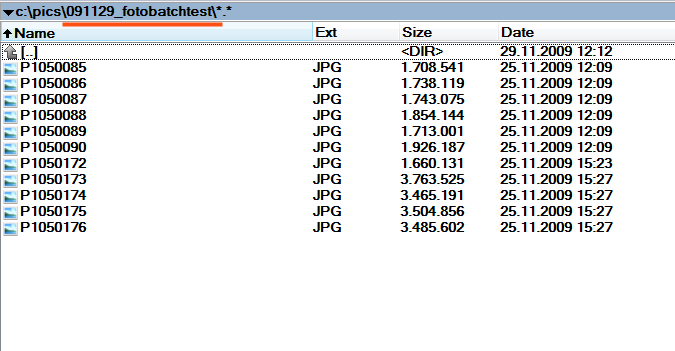
Naming the picture directory like YYMMDD_eventname has two advantages:
- Fotobatch will automatically recognize the event name!
- If all picture directories from all your events are in one big directory, they are automatically sorted by date, which is the most convenient sorting method in most cases.
As you can see above, the pictures are quite big (up to 3.5 MB per file) and the filenames are totally meaningless.
2) Start Fotobatch, choose picture directory and press EXECUTE SELECTED
Now start Fotobatch. You immediately have to choose the picture directory. Select the directory just created:
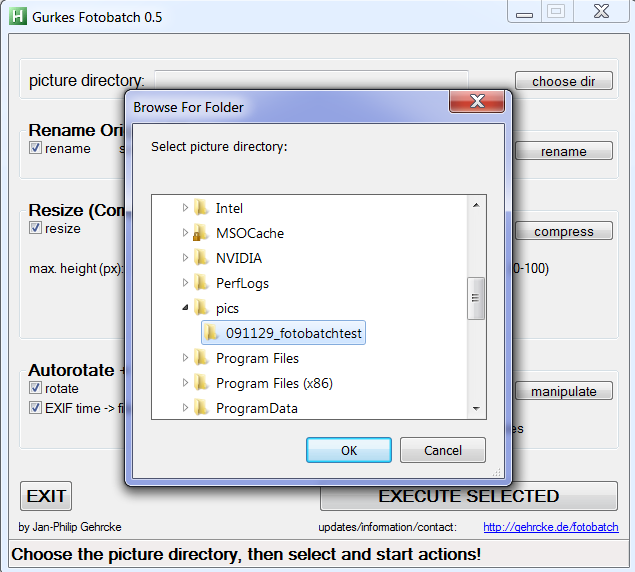
Press OK.
Fotobatch automatically detects the event name and suggests a compression directory name. Now press EXECUTE SELECTED:
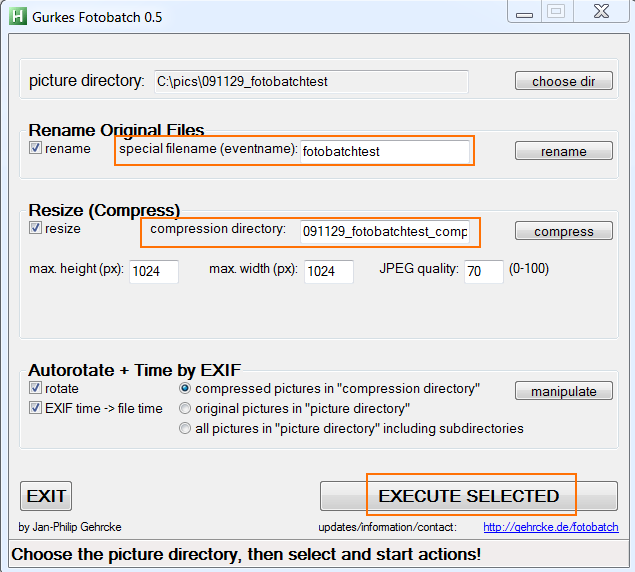
Now Fotobatch at first renames the original picture files (It puts the file creation time — which is assumed to be the real time the photo was taken — to the front of the file name. Then the event name follows and afterwards the original name given by the camera is written).
Then, it makes resized/compressed copies of the original pictures and puts them into the compression directory.
Afterwards, Fotobatch turns the compressed pictures by evaluation of the EXIF orientation data that was stored by your camera. Finally, the photo recording time is read out from the EXIF data and the file creation times of the compressed pictures are adjusted correspondingly.
When these three main steps of rename/resize/turn are finished, Fotobatch looks like:

So the original pictures are substantially kept untouched (except for the filename) and the compressed ones are ready to be published: they are small, named properly and have the correct orientation.
3) The result in detail
Let’s observe the result. First, the original pictures:
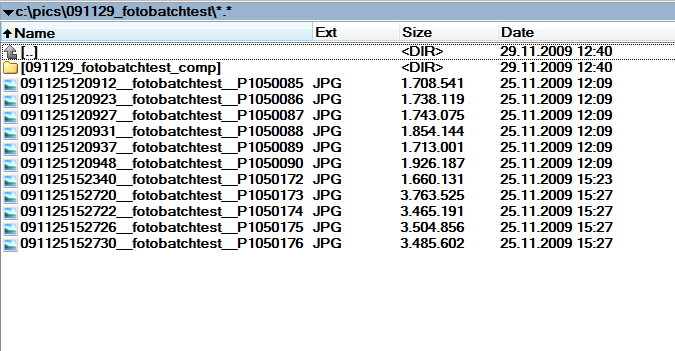
The original picture files got renamed as described above. Nothing else than the filename of the original pictures was changed. The compression directory was created inside the picture directory. Its content looks like:
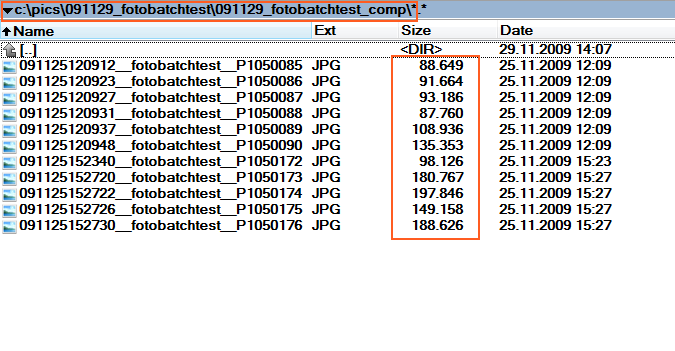
Due to reduced resolution and JPEG quality, these picture files are much smaller than the original files. The standard settings are chosen carefully; the pictures are not too small and still have a good quality. What you cannot see here is that all the pictures in the compression directory have correct orientation, as given by the EXIF orientation information. Regarding the file creation dates in the last screenshot: As already mentioned, they come from the EXIF information and correspond to the camera recording time.
4) Advanced usage: changing the options…
Gurkes Fotobatch combines standard features in a combination that no other software provides (let me know if I’m wrong): It renames, resizes/compresses and turns (by EXIF) with only one click. With this I am able to manage my photos much faster than with any other solution. The use case above is Fotobatch’s standard use case. I chose these standard settings according to my needs, so that I just need to click the EXECUTE SELECTED button after selecting the picture directory. In addition to this simple usecase one can modify the settings, so that Fotobatch bares more complex properties, providing a variety of possible features like
- repairing file creation dates (you should always do this before using Fotobatch’s rename function, which takes its information out of the file creation time)
- turn all of your existing pictures according to their EXIF orientation flag
- keeping photos of one event from more than one camera in one folder in correct order
There are many more use cases, it’s up to you… As you can see in the screenshots, Fotobatch’s behaviour is totally changeable. Everything should be self-explanatory.
5) Download / updates / information
The main static website for Fotobatch is http://gehrcke.de/fotobatch. There you’ll always find the most recent version to download it.
Blog posts about Fotobatch (like this one) can be found by checking the corresponding category: http://gehrcke.de/category/fotobatch/
Fotobatch is not perfect and its mainly written for my personal use. If you have any questions or suggestions or wishes for changes/new features, please let me know!
Leave a Reply